Inclusion Tag

Inclusion Tag: This is a variation of Blog tag

No equipment needed

● There are no safe bases in this tag game.
● Pick four people to be “taggers”. You may tag with your hand, using a gentle touch (shoulders
and below). Ready, Go:
● When you are tagged, join hands or elbows with your tagger. Now two people are taggers and
they move together in an attempt to tag more people.
● When the group has four people in it, it breaks into two groups of two and both groups
continue tagging and growing their group to a maximum of four.
● This continues until all or nearly all of the people in class have been tagged.

Print Friendly, PDF & Email

Knee Tag

Knee Tag: Everybody It

Setup and Equipment: No equipment needed.

handsonkneesGuidelines:

  • This is an “Everybody It” Game:
  • The object of this game is to tag other players on the knee
  • If you get tagged on the knee, you immediately go down to one knee and extend a hand. You may continue playing the game after a classmate gives you a “five” with their hand.
  • Variation: You may have students do a 5 second or 5 repetition exercise such as push-ups, sit-ups, etc.
  • You are immune from getting tagged whenever you are standing still with your hands covering your knees. This is the same as standing on a base in many other tag games.
  • Players may only have hands on knees for three seconds, then they have to move.
  • You may not move or run with hands on your knees.
  • This is continuous game.
  • Speed Up Variation: To add some excitement near the end of the activity– The Teacher stops the music and asks everyone to raise their hands in the air. For the next minute you cannot cover your knees so there are no bases and the other tag rules remain.
  • After a minute is up, stop the music and everyone returns to the regular Knee Tag rules.
  • THE MOST FUN WINS!
Print Friendly, PDF & Email

Valentine Hug Tag

Setup and Equipment:

  • Four soft red balls for the “cupid – its”
  • Practice the hug: Lean forward with two soft taps
  • Practice the Macho Hug: Do a thumb handshake with two hand taps on the other person’s back
  • Practice becoming a “heart” by lifting arms (elbows up) above their heads and pointing their hands downwards to the top of their head.
  • When a person is tagged they stand frozen in this position.

Guidelines:

  • The “cupid – its” attempt to tag players by throwing or tagging them with the red ball
  • If a player is tagged, they stand frozen in the “heart” position
  • A heart is unfrozen and the player returns to the game when another player gives them a hug – or a “macho hug”
  • Continue the game by having the “old its” pick “new its”until turns are completed by each student.


Print Friendly, PDF & Email

Reindeer Tag

Setup and Equipment

  • Equipment: Yarn balls or stuffed animals for tagging
  • Four people are chosen to be “its”

Guidelines

  • When a student gets tagged they kneel with one knee down and one knee up. They put their thumbs on their head and spread their fingers out like antlers.
  • In order to be defrosted from the “reindeer position” the other players approach the frozen player from the front and wiggle their antlers/fingers together to free them.
  • After a one to two minute winter holiday song, a transition song is played. The theme from the Nutcracker works well right before the winter break.


Print Friendly, PDF & Email

Juggling and Diabolo

juggledog

Juggling 1 ball:  Throw – Catch, Throw – Catch

1. Throw and catch using one hand, then the other
2. Throw with one hand and catch with other
3. Throw, clap, catch with other hand
4. Throw, clap, clap, catch with the other hand
5. Throw, clap under leg and catch with the other hand and so on
5. Throw, turn all the way around and catch with other hand, etc.

Juggling 2 balls: 1. Throw – Throw, Catch-Catch

  1. Start with two balls in your favorite hand, throw one up, when it gets to the top, throw the other one
  2. Throw around in a circle, throw the first one out toward the side, when it peaks throw the second in the same arc, keep them going in a circle
  3. Throw in circle from outside to the center
  4. Do each of these 3 moves with the other hand
  5. Hold a ball in one hand, throw the first across like a big letter “x”, when it gets to the top throw the second up and across the other way; catch the first, pause, catch the second

Three Balls; Throw – Throw – Catch – Throw – Catch

  1. Start with 2 balls in your dominant hand. #1 is held loosely on the finger tips, #2 is in the other hand and #3 is deep in the dominant hand.
  2. Throw #1, Throw #2, Catch #1, Throw #3 and let #2 and #3 fall
  3. Throw #1, Throw #2, Catch #1, Throw #3, Catch #2 and let #3 fall
  4. Throw #1, Throw #2, Catch #1, Throw #3, Catch #2, Catch #3

    CUE: THROW-THROW-CATCH-THROW-CATCH-CATCH

    Challenge: Under the leg and behind the back can be used to start a juggling sequence.
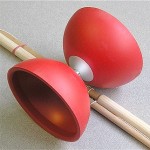
    ____________________________________________________________________

Diabolo

Diabolo


  •  Set the diabolo in front of your right foot, stand up and move to farther to the right if possible. The farther the diabolo is set to the right of you, the more spin possible. (Note: lefties will need to set the diabolo to the left)
  • Before rolling the diabolo, stand pointing your sticks at the diabolo off to your left. The string should be hanging from sticks to diabolo. If not, position the diabolo even farther right.
  • Roll the diabolo across the floor in front of you. Start your roll slow, but accelerate faster as the diabolo moves left.
  • As the diabolo reaches a point in front of you (before your left foot’s position); gently lift the diabolo up with both sticks.
  • The diabolo should be spinning counterclockwise.
  • Try to center the diabolo and begin to pull harder with the Right handstick.
  • Practice goals are to reach a medium speed without causing the diabolo to swing wildly after the pickup.


Print Friendly, PDF & Email

Rock, Paper, Scissors Partner Tag

Equipment and Setup:

  • Two lines facing each other in the middle of the gym.
  • Space each line so players are  spread out.
  • Each player should have someone across from them. This is their partner.

Practice with the teacher:

  • Rock is a fist (Everyone make a fist).
  • Paper is a flat hand facing down (Everyone make a flat hand facing down).
  • Scissors is a hand that simulates scissors with the 1st and 2nd fingers separating and closing (Everyone make a hand that simulates scissors).
  • ROCK SMASHES SCISSORS
  • PAPER COVERS ROCK
  • SCISSORS CUTS PAPER

Guidelines:

  • Teacher gives signal or starts music to begin game.
  • Partners do rock, paper, scissors by facing each other and pounding their fist into their hand and together chanting: “1,2,3 show”.
  • One the word “show” each player displays either rock, paper, or scissors.
  • When a player wins they become  they become the tagger and do 5 jumping jacks or three spins.
  • The other player may move around the gym and attempt to avoid the tag. When playing in the gym you may want to  define a locomotor skill such as walking (power walking), slide-stepping, skipping, or galloping.
  • The tag we use is called the peace tag. Hold your two fingers up and show the peace sign. When you tag, it is a  peaceful tag,  two fingers in the middle of your partner’s back.
  • After the tag, you can do the rock, paper, scissors to begin a new game again. In grades K /1/ 2 it may work better to just have partners change roles each time.
  • For a longer game and more interaction, pick new partners after each player has completed turns as the tagger and another turn as the player being tagged.


Print Friendly, PDF & Email

Crows and Cranes

Setup and Equipment:

  • Divide class into two teams.

Guidelines:

  • Have each team line up facing each other about 6-10 feet apart.
  • One team is the “crows” and one team is the “cranes.”
  • The teacher calls one of the teams.
  • The team’s name that is called has to run back to the end line without getting tagged by someone on the other team. If they get tagged, they join the other team.
  • If “crows” is called, cranes are chasing the crows. If “cranes” is called, crows are chasing the cranes.

Print Friendly, PDF & Email

One Base

Setup and Equipment:

  • Two or three  foam  balls, two cones: each one placed 10 feet from the baseline on each side.
  • Two teams: a running team and a defense team

Guidelines:

  • The running team starts behind one cone in the gym. This area is their “base.” They must run from their base to the other cone in the gym and back without getting hit with a ball.
  • If they get hit, they stand against the wall.
  • The defense cannot move with the ball. They have 3 seconds to either throw at a runner or pass to a teammate who is closer.
  • Emphasize teamwork! Teams that work better together and pass the ball well will be more successful. Switch teams every 2 minutes.

Recommended for 3rd, 4th, 5th

Print Friendly, PDF & Email

Circle of Power

Setup and Equipment:

  • Foam balls, stackable mats set up vertically at each corner of the basketball court lines, stopwatch
  • Two teams: a running team and a throwing team.

Guidelines:

  • The running team starts in one corner of the gym. Their goal is to complete as many laps as possible in the allotted time (usually 1 or 2 min.). For every lap each team member completes, they get one point for their team.
  • If they get hit with a ball (must be a direct hit, no bounces or deflections, *headshots don’t count), they must stand against the wall, out of the way of the runners. They can get back in only if they catch a ball that the throwing team throws.
  • The throwing team stays in the middle circle to throw at the runners. They may leave to get a ball, but must return to the circle to throw.
Print Friendly, PDF & Email

Warmup: Corners

Setup and Equipment

  • 4 Cones: Set up near each corner of the gym.
  • 4 Signs with various locomotor movements. (4 different movements on each card).
  • Set up an equal number of students to start at each corner.
  • Start the music to begin

Guidelines

  • Each group reads the top item on their list and moves in counterclockwise direction to the next cone.
  • At the next cone, read the first item and complete that movement to the next cone.
  • Continue completing the 1st item on each card until you reach your starting point.
  • Now, do all of the #2 items on each card, until you reach the starting point.
  • Continue this pattern until all four items on each card are completed.
  • You may start over on #1 and continue until the music stops
  • Walk
  • Gallop
  • Side-Slide (facing inside area)
  • Crab Walk
  • Jog
  • Power Walk
  • Skip
  • Grapevine
  • Tip-Toe Walk
  • Gallop (change lead foot each time)
  • Hop
  • Heel Walk
  • Invisible Jump Rope
  • Side-Slide (facing outside area)
  • Run
  • Print Friendly, PDF & Email