Equality (Straddle) Ball

Equality (Straddle) Ball Setup:

  • One soft small foam ball  or playground ball for a group of five to eight students.
  • The group sets up in a circle with legs wide apart and feet touching.
  • The space between each player’s feet is a goal that they defend by using their hands only.
  • Bend your knees and get low with the palms of your hands facing the middle of the circle and your fingers pointing down.
  • Ready, Begin…

The game starts when one player sets the ball in front of them and taps it with their hand in an attempt to get the ball through another player’s legs.

  • The ball may only be tapped with their hands. No stopping the ball and rolling it.
  • You may not reach over in front of another player’s “goal”.
  • If a ball travels outside of the circle, the player that touched it last should retrieve it and start a new game.

Variation One: Use two or even three balls if it is a larger group.

 Variation Two (Doggy Style): Turn around so you are facing out. Position your feet, so you have to hit the ball through your legs backwards.


Print Friendly, PDF & Email

Halloween Activities

Monster Mash – Music: Monster Mash

  • Eight Steps Forward, back – Frankenstein Style
  • Criss Cross Arms – Four counts – two with right arm top, then two with left
  • Hammer Fists – Eight Counts:  two with right fist on top, then two with left
  • Hitch Hike – Eight Counts – two with right thumb, then two with left, two with right, two with left.
  • Twist 8 counts: Start the first two counts while you twist back and forth, then go lower for each two counts until you finish the final 2 counts about knee-high.
  • Repeat the steps above for two stanzas. Then for the rest of the song twist high, low, one foot, then the other.

Pumpkin Tag

Setup and Equipment:

  • Stuffed Halloween character work well instead of yarn balls.
  • Gym mat in front of each wall for a 3 second base.
  • In our gym we randomly choose one team, which is 4-6 people to be taggers

Guidelines:

  • Start up the Halloween music.
  • Taggers can toss or tag by tossing or tagging shoulders or below.
  • If a child is tagged, the child must freeze and sit down on the floor in a pumpkin shape (arm hugging his/her knees to the chest with one fist making a stem on his/her head).
  • In order to become “unfrozen,” any player that is not a “witch” must see the frozen pumpkin, and give their stem a fist bump to free them.

Zombie Tag
Music: Halloween Favorites  with the Simpson’s Halloween Special as transition music.

Setup and Equipment:

  • Stuffed Halloween characters or yarn balls to use as taggers.
  • One mat is set up in front of each wall – these are safe bases

Guidelines:

  • One team of 4-6 students is randomly chosen as “its” – they may throw (shoulders or below) or just tag players.
  • If they are tagged, they are turned into a zombie, they have to find another zombie. Walk like a zombie until you find another zombie, then make a bridge with their hands, then a 3rd zombie will walk under the bridge and all three of them will have “free walk backs to a mat.
  • Play continues for about two minutes while the Halloween music is played.
  • When the music stops, choose a new team of taggers.
Print Friendly, PDF & Email

Hands Down Four Square

Hands Down Four Square

  • Fingers always point down. No holding ball during play.
  • 4 square serves to 1 square. A good serve is bounced on the blacktop, then hit to the one square. If you win three times in square 4, go to the end on the line.
  • All line balls are good, so always play the ball. When a player is out, they must go to the end of the line and players move up to fill vacated square.
  • You are out when:
  • You hit the ball out of bounds
  • The ball hits twice in your square.
  • You touch the ball when it’s in the air.
  • Who’s out? The “judge” 1st person in line decides disputed calls.  
Print Friendly, PDF & Email

Hoop Passing for Small Groups

Equipment and Setup:

  • Student arranged in groups of five to eight.
  • Hula Hoops: Two per group
  • Group holds hands in a circle facing each other

Guidelines:

  • Each group hangs one of the hula hoops on a pair of linked hands in the group. The other hoop is set on the floor outside of the circle.
  • The object of this is activity is to see how quickly and gracefully the hoop can be moved around the circle back to the starting point without letting go of your hands. Bending, twisting and talking to each other will be a big help.
  •  The most popular way to pass the hoop is by stepping into and ducking through the hoop, while lifting the hoop up and down and using gravity to slide the hoop.
  • Once a group can pass one hoop around the circle add a second hoop and continue.
  • How many times can you get the two hoops passed around your circle in two minutes or the time of one song.

Other Ideas:

Reverse: Play music to start passing the hoop. When you hear the sound of a truck backing up change the direction that you are passing.

Magic Passing

  • Start two hoops facing each other on opposite sides of the circle. Use “magic” or change the shape of your hoop to get them to pass through each other until they reach the starting point.

Caterpillar Line Race

Equipment and Setup:

  • Six groups of students line up at one end of the gym
  • Hula Hoops: Two per group
  • Group holds hands in a line standing next to each other.
  • Two hoops are on the floor next to the end line of the last person in line.

Guidelines:

  • The object of this activity is to get your group to the opposite end of the gym.
  • The hoops are passed backwards towards the starting line. When the hoop gets over the last person in line, they run to the front of the line toward the end line at the destination.
  • Continue passing the hoops backward and moving the line forward until you reach the destination.


Print Friendly, PDF & Email

Cup Stacking: Sport Stacking

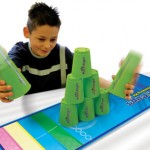
Cup Stacking

For a free set of  Speedstacks and a DVD: Go to their teacher web site and fill out their online information. Click the Cup stacking picture (above), or the following link:

Speed Stacks Teacher Central

Basic Stacking Information

  • Introduction: The first day of cup-stacking is a DVD or smart board video if your students have not been previously  introduced. The DVD, videos  and other Sport-stacking items are available at the Speedstacks website. There are also many videos on  You Tube.

Teach Stacking in order of difficulty:

  • 3-3 Stack
  • 3-3-3 Stack
  • 6 Stack
  • 1-10-1 Stack

Six Stack -up stack

  • Start with 6 cups in front of you
  • Take 3 cups with your right and 2 cups with your left
  • Leave one cup down
  • Spread the cups apart with your fingers
  • Release the bottom cup of your right hand to the right of the center cup so you now have 2 cups left in that hand
  • Release the bottom cup with your left hand to the left of the center cup
  • Release the next cup from your right hand on top of the center
  • Set the cup on in the left hand next to it
  • Put the final cup on on top with right hand

6 Stack -Down stack

  • Place right hand on top cup and your left hand on the second cup on the left
  • Slide to the right with your right hand, at the same time slide left with your left hand
  • Take the 3 cups in your left hand and the 2 cups in your right hand and put them in one stack of 6 cups

Partner Challenge:

  • Sets of cups are needed for each students.
  • Students sit in pairs across from each other.
  • Teacher designates a stacking formation:
  • 3-3-3-3
  • 3-6-3
  • 1-10-1
  • Start in down-stack position.
  • Stand up when up-stacking and down-stacking are complete.
  • Teacher gives the accumulated time count after the first person is standing.

Around the Table

  • (Set up tables so four people to six people are able to stack at the same time)
  • Students stand behind a table in front of down-stacked cups.
  • Teacher designates a stacking formation:
  • 3-3-3-3
  • 3-6-3
  • 1-10-1
  • After upstacking and downstacking –
  • Rotate to the right and begin the next stack.
  • Continue until everyone is back to their starting position.

Shuttle Relay

  • Students stand in shuttle relay style.
  • Cups are set up in the middle of the gym with one stack for each team. (in line with their team position)
  • Teacher designates a stacking formation:
  • 3-3-3-3
  • 3-6-3
  • 1-10-1
  • On the signal, the first stacker runs to the middle and stacks up.
  • Then they run to their teammates on the opposite end of the gym and give them a “five”.
  • This stacker goes to the middle and down-stacks.
  • Continue until everyone is back to the starting position, or…
  • Set a time, such as 2 minutes and see how many stacks can be made in that amount of time.

Scooter Relay

  • Students are lined up in teams in relay style with a partner.
  • Each team has two scooters linked together.
  • Each team has downstacked cups in the middle of the gym floor and at the opposite end.
  • Two students from each team will take turns as the pusher and the rider.
  • One partner from each team is sitting on the scooter, with feet extended forward
  • The other partner (next in line) will be pushing.
  • One set of 6 cups is on middle gym line.
  • Three sets of three cups are at the opposite end of the gym.
  • Students are pushed on the scooters to the center stack – up-stack the three sets of three.
  • Then, travel to the opposite end and up-stack the 6 cup stack
  • Now partners switch places and the new “rider” will down-stack the same set of cups.
  • Return to the beginning of the line and pass the scooters to the next partners in line.
  • Continue until everyone has had a turn up-stacking and down-stacking.
Print Friendly, PDF & Email

Rotating/Stationary Line Pass

Line Pass (Stationary Line/Rotating Line): Get a lot of practice passing balls/ etc. with a variety of partners

Setup/Equipment:

  • Line up the class so that there are two lines facing each other about ten feet apart.
  • Spread out, so everyone is directly across from a partner.
  • For K-2,  it helps if each participant has a polyspot to stand on. You may want to use playground balls rather than basketballs.

Guidelines:

  • One line is the Stationary line – each person in that line gets a ball. They are in charge of the ball and always hold it during transitions.
  • The other line is the rotating line – they will rotate down to the next person in line during the transition music.
  • MUSIC:  I set up a playlist of about 20 songs and set the time for 40 seconds. Then I place a transition song that repeats between songs that is about 10 seconds long.
  • Start music:  Students pass the ball back and forth. Start with a bounce pass which is usually more accurate and easier to catch.
  • Rotate: After the songs ends there is a ten second transition song for the person at the end of the rotating line to run up and take their place at the beginning of the line. Everyone else in the rotating line moves down one place.
  • Reminders: A good pass is one that your partner catches. How many passes can you make in 40 seconds.
  • Adjust the length of the pass according to each grade level. Then adjust during the activity for each grade level.
  • Vary the style of passes: Bounce, chest, overhead

Variations: Stop the activity at any time to make changes. The stationary line now gets a chance to run over and make the change this time. Here’s some possibilities:

  • Chest Pass with Playground Balls/Basketballs
  • Bounce Pass with Playground Balls/Basketballs
  • Beanbags
  • Foam balls
  • Deck Rings
  • Footballs
  • Spinjammers/ Soft Frisbee
Print Friendly, PDF & Email

Tunnels

Equipment and Setup:

  • (Use Soft Soccer style ball or beanbags )
  • One ball or beanbag for each student
  • Chose partners – Decide who will be the tunnel to start the activity. The partner will be moving around the gym and try to close all of the tunnels by moving their ball or beanbag through tunnel.

Guidelines:

  • The people who are “tunnels” may pass a ball to themselves in the air, while the other students are dribbling their balls. If you’re using a beanbag, the tunnel can just throw and catch with themselves.
  • The partner will get a ball and begin to dribble with their feet in the playing area. If you’re using a beanbag and just throw and catch in the air, or practice sliding it.
  • When the activity begins half of the students will dribble their balls on the floor, and attempt to pass a ball through as many tunnels as possible. If you’re using beanbags, you’ll slide it through the legs.
  • The “tunnel” students should count how many balls or beanbags pass through their legs.
  • When five balls or beanbags have passed through a tunnel, that tunnel is closed and they sit down.
  • When all of the tunnels are closed, everyone sits down.
  • Partners connect with each other and change positions. There are new tunnels and new people moving to see how quickly they can close all of the tunnels.
  • Teacher may time students, then see if they can improve the time it takes to shut down all of the tunnels.
  • Variation: Tunnels open and close (jumping jack style)
Print Friendly, PDF & Email

Square Dance: Random Style

Teach these a few at a time while students move around the gym by themselves. The music stops whenever it’s time to teach a new set of skills. When you get to the partner section, students pick someone close to them.

Group Formation: Spread out on the floor with space between you. Move around the gym in a clockwise direction (random style if group is capable).

  • Stomp Clap: Stomp one foot and clap to the Music: An Angel Went up in Flames
  • Hit the Lonesome Trail: Walk/strut to the Music: Turkey in the Straw
  • Turn One Alone: Pivot around one time while moving.           Music: Ol Joe Clark
  • Cyclone: While walking turn around 2 times and continue walking. Music: Ol Joe Clark
  • Pony Express: Do the step twice as fast Music: Boil the Cabbage Down The Grascals
  • WildHorse: Keep one foot in front and gallop like a horse around the gym. Music: Wild Horse by RaeLynn
  • Riding a Horse, Lasso: Wrist over Wrist  Gangman Style PSY

Partners:

  • Honor Your Partner: Face your partner and bow. Music: Salty Dog Blues Grisman
  • Circle Up Two: Join hands and skip in a circle. Music: Rocky Top
  • Elbow Turn: Do right arm turn, then left. Music: American Folk

New Partners:

  • Horse and Jockey: Stand one in front of the other, back partner’s hands are on the shoulders.
  • Gallop together. Music: William Tell Overture Wee Sing
  • Change Jockeys: Switch places.
Print Friendly, PDF & Email

Basketball Game: Recycle the Basketballs

Setup and Equipment:

  • Six Relay teams and one baton or ball to designate current runner.
  • One hula hoop for each team (in the middle of the gym in line to the opposite wall).
  • About thirty balls are in barrels or on a ball cart near the opposite wall.

Rules:

  • On teacher’s signal, one student from each group runs to the original stash of balls at the opposite wall and dribble one ball to their teams hula hoop.
  • The dribbler then runs back the their team’s line and hands them the baton.
  • When all of the balls are gone from the original stash, players may now take them from the other team’s hula hoops.
  • Students may not take balls from the hoops that are directly next to them (on either side)
  • There is no guarding of the hoop
  • Dribbling challenges such as changing from dominant to non-dominant hand or doing a crossover dribble may be added.
  • The object of the game is to have as many of the balls in your team’s hoop when the teacher signals that the game is over.
  • When the teacher stops play, the second phase of the game begins.
  • Now, players will return the ball to the ball rack one at a time. The other teams may help the team with the most balls to return their balls.
Print Friendly, PDF & Email

4th/5th Game: Scooter Basketball

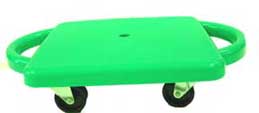
Scooter_green-PE

Equipment and Setup:

  • To start the game, pick two teams and they line up facing each other along the line at each end of the gym.
  • Each team should wear a vest to identity which team they are on.
  • Line up so that each team has about the same number of players and they are evenly spaced out.  Note: If you don’t have written numbers on the floor, you can use polyspots
  • Put a container in front of each end wall (A large trash barrel works fine). I usually put it on a gym mat, so players aren’t able to roll right next to the goal.

Guidelines:

  • Two or three players from each team go to the middle on scooters. Note: The players who remain in line do not have scooters.
  • The games starts by the teacher giving a ball to the last player on one of the teams. Player pass the ball down from one player to another until it reaches the side of the gym where their basket is.
  • After everyone in the class has had a turn on the scooters, you can change the number of players. Adding one player after each round to a maximum of five works well.
  • Players on scooters who are in the defensive position may only put their hands straight up into the air (not reach for the ball).
  • If after two to three minutes there is no winner, the teacher can can count backwards from ten to one for an exciting finishl
  • If a player handling the ball falls off of the scooter, the ball goes to the other team.
  • The scooter players may not dribble, only pass or score.
  • Sideline players are important in this game. They cannot score, but contribute to the game by passing the ball. Remind the players that the ball is impossible to intercept if it is passed down their own line.
  • Players on scooters will need to be reminded to pass to their teammates on the sides.
  • You may keep score … and/or THE MOST FUN WINS!
Print Friendly, PDF & Email