Warmup: Bank/Lake

Bank/Lake

Setup and Equipment

  • Use the lines in the gym to designate a large area in the gym that is the lake.
  • You may want to add some ropes to corners of squares to make the lake wider.

Guidelines: 

  • Students will be moving around the bank of the lake. They’ll need to follow the teacher’s directions.
  • When the teacher says, “lake” jump with 2 feet into the lake.
  • When the teacher says, “bank” jump with both feet, but land on one foot and balance.
  • Use locomotor skills: walk, power walk, jog, skip, grapevine, funny walk, backwards walk
  • Occasionally say lake, when you’re in the lake and bank when you’re already on the bank.

This is a fun warmup, so just jump to the right place whenever you were fooled with the direction.


Print Friendly, PDF & Email

Equality (Straddle) Ball

Equality (Straddle) Ball Setup:

  • One soft small foam ball  or playground ball for a group of five to eight students.
  • The group sets up in a circle with legs wide apart and feet touching.
  • The space between each player’s feet is a goal that they defend by using their hands only.
  • Bend your knees and get low with the palms of your hands facing the middle of the circle and your fingers pointing down.
  • Ready, Begin…

The game starts when one player sets the ball in front of them and taps it with their hand in an attempt to get the ball through another player’s legs.

  • The ball may only be tapped with their hands. No stopping the ball and rolling it.
  • You may not reach over in front of another player’s “goal”.
  • If a ball travels outside of the circle, the player that touched it last should retrieve it and start a new game.

Variation One: Use two or even three balls if it is a larger group.

 Variation Two (Doggy Style): Turn around so you are facing out. Position your feet, so you have to hit the ball through your legs backwards.


Print Friendly, PDF & Email

Halloween Activities

Monster Mash – Music: Monster Mash

  • Eight Steps Forward, back – Frankenstein Style
  • Criss Cross Arms – Four counts – two with right arm top, then two with left
  • Hammer Fists – Eight Counts:  two with right fist on top, then two with left
  • Hitch Hike – Eight Counts – two with right thumb, then two with left, two with right, two with left.
  • Twist 8 counts: Start the first two counts while you twist back and forth, then go lower for each two counts until you finish the final 2 counts about knee-high.
  • Repeat the steps above for two stanzas. Then for the rest of the song twist high, low, one foot, then the other.

Pumpkin Tag

Setup and Equipment:

  • Stuffed Halloween character work well instead of yarn balls.
  • Gym mat in front of each wall for a 3 second base.
  • In our gym we randomly choose one team, which is 4-6 people to be taggers

Guidelines:

  • Start up the Halloween music.
  • Taggers can toss or tag by tossing or tagging shoulders or below.
  • If a child is tagged, the child must freeze and sit down on the floor in a pumpkin shape (arm hugging his/her knees to the chest with one fist making a stem on his/her head).
  • In order to become “unfrozen,” any player that is not a “witch” must see the frozen pumpkin, and give their stem a fist bump to free them.

Zombie Tag
Music: Halloween Favorites  with the Simpson’s Halloween Special as transition music.

Setup and Equipment:

  • Stuffed Halloween characters or yarn balls to use as taggers.
  • One mat is set up in front of each wall – these are safe bases

Guidelines:

  • One team of 4-6 students is randomly chosen as “its” – they may throw (shoulders or below) or just tag players.
  • If they are tagged, they are turned into a zombie, they have to find another zombie. Walk like a zombie until you find another zombie, then make a bridge with their hands, then a 3rd zombie will walk under the bridge and all three of them will have “free walk backs to a mat.
  • Play continues for about two minutes while the Halloween music is played.
  • When the music stops, choose a new team of taggers.
Print Friendly, PDF & Email

Bear Sighting Freeze Tag

Setup and Equipment:

  • Everybody It Version: No equipment needed

Guidelines:

  • Students are tagged with a two finger (peace sign) tag on someone’s knees.
  • If someone is tagged in this game; make themselves as big as they can by spreading legs and stretching out hands.These are  the protocols for a bear sighting in the woods near Spencer Butte. Remain standing in this frozen position until saved by a classmate.
  • To be saved from a frozen state, classmates will give them a high five to get back in the game.
  • Students have one way to avoid being tagged.  They are safe in in this game when they are pivoting on one foot. Students may do this for three turns, then they can move again.
  • Game changer: No bases. For 30 seconds there is no pivoting.
  • The game continues for about about five minutes or so.
  • Variation: Choose taggers who can use yarn balls as taggers.


Print Friendly, PDF & Email

Hoop Driving

Equipment and Setup:

  • One hula hoop for each student in the class.
  • Set up cones near each corner of the gym with enough room for the students to easily pass around the outside of the cone.
  • Music for Driving

Guidelines:

Today students will be simulating driving a car by holding their hula hoop in the air as if it were a giant steering wheel.

  • Spread students out around the giant circle which is designated with the four cones.
  • Students will be following the directions of the teacher as they move around the gym in a counterclockwise direction.

Driving Actions: Teacher led demonstration followed by the students practicing the skill as they move around the gym.

  • Song 1.  Sound Effects  Start Your Engines: Turn on your car.
  • Song 2.  I’m Walkin’  Yellow light:  Move slowly with caution
  • Song 3.  Stop in the Name Red Light: Stop and Freeze
  • Song 4.  School Day  School Zone: Students are always happy as they go to school. Let’s see those happy children going to school.
  • Song 5.  Greased Lightning Highway: Speed limit is now 70 mph, not 20 mph like in the school zone. So, get moving!
  • Song 6. Rock Around Uphill: Lift your knees up high as you march up the hill.
  • Song 7. At the Hop  Flat tire – Hop on one foot until you are so tired you have to pull over. You may stand on one foot and balance as you await assistance.
  • Song 7. Grease Tunnel: Bend your knees and drive.
  • Song 8.  Sound effects Emergency vehicle: Pull over to the right side as the siren sounds.

Two Directions at the same time!

  • Song 9 . Happy Yellow Light and School Zone –Slowly Skip in a School Zone
  • Song 10. Sound effects Uphill and in Reverse March backwards
  • Song 11.  Afro Nuts Reverse and School Zone Skip Backward in the school zone
Print Friendly, PDF & Email

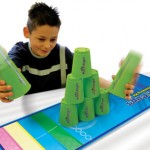
Cup Stacking: Sport Stacking

Cup Stacking

For a free set of  Speedstacks and a DVD: Go to their teacher web site and fill out their online information. Click the Cup stacking picture (above), or the following link:

Speed Stacks Teacher Central

Basic Stacking Information

  • Introduction: The first day of cup-stacking is a DVD or smart board video if your students have not been previously  introduced. The DVD, videos  and other Sport-stacking items are available at the Speedstacks website. There are also many videos on  You Tube.

Teach Stacking in order of difficulty:

  • 3-3 Stack
  • 3-3-3 Stack
  • 6 Stack
  • 1-10-1 Stack

Six Stack -up stack

  • Start with 6 cups in front of you
  • Take 3 cups with your right and 2 cups with your left
  • Leave one cup down
  • Spread the cups apart with your fingers
  • Release the bottom cup of your right hand to the right of the center cup so you now have 2 cups left in that hand
  • Release the bottom cup with your left hand to the left of the center cup
  • Release the next cup from your right hand on top of the center
  • Set the cup on in the left hand next to it
  • Put the final cup on on top with right hand

6 Stack -Down stack

  • Place right hand on top cup and your left hand on the second cup on the left
  • Slide to the right with your right hand, at the same time slide left with your left hand
  • Take the 3 cups in your left hand and the 2 cups in your right hand and put them in one stack of 6 cups

Partner Challenge:

  • Sets of cups are needed for each students.
  • Students sit in pairs across from each other.
  • Teacher designates a stacking formation:
  • 3-3-3-3
  • 3-6-3
  • 1-10-1
  • Start in down-stack position.
  • Stand up when up-stacking and down-stacking are complete.
  • Teacher gives the accumulated time count after the first person is standing.

Around the Table

  • (Set up tables so four people to six people are able to stack at the same time)
  • Students stand behind a table in front of down-stacked cups.
  • Teacher designates a stacking formation:
  • 3-3-3-3
  • 3-6-3
  • 1-10-1
  • After upstacking and downstacking –
  • Rotate to the right and begin the next stack.
  • Continue until everyone is back to their starting position.

Shuttle Relay

  • Students stand in shuttle relay style.
  • Cups are set up in the middle of the gym with one stack for each team. (in line with their team position)
  • Teacher designates a stacking formation:
  • 3-3-3-3
  • 3-6-3
  • 1-10-1
  • On the signal, the first stacker runs to the middle and stacks up.
  • Then they run to their teammates on the opposite end of the gym and give them a “five”.
  • This stacker goes to the middle and down-stacks.
  • Continue until everyone is back to the starting position, or…
  • Set a time, such as 2 minutes and see how many stacks can be made in that amount of time.

Scooter Relay

  • Students are lined up in teams in relay style with a partner.
  • Each team has two scooters linked together.
  • Each team has downstacked cups in the middle of the gym floor and at the opposite end.
  • Two students from each team will take turns as the pusher and the rider.
  • One partner from each team is sitting on the scooter, with feet extended forward
  • The other partner (next in line) will be pushing.
  • One set of 6 cups is on middle gym line.
  • Three sets of three cups are at the opposite end of the gym.
  • Students are pushed on the scooters to the center stack – up-stack the three sets of three.
  • Then, travel to the opposite end and up-stack the 6 cup stack
  • Now partners switch places and the new “rider” will down-stack the same set of cups.
  • Return to the beginning of the line and pass the scooters to the next partners in line.
  • Continue until everyone has had a turn up-stacking and down-stacking.
Print Friendly, PDF & Email

Rotating/Stationary Line Pass

Line Pass (Stationary Line/Rotating Line): Get a lot of practice passing balls/ etc. with a variety of partners

Setup/Equipment:

  • Line up the class so that there are two lines facing each other about ten feet apart.
  • Spread out, so everyone is directly across from a partner.
  • For K-2,  it helps if each participant has a polyspot to stand on. You may want to use playground balls rather than basketballs.

Guidelines:

  • One line is the Stationary line – each person in that line gets a ball. They are in charge of the ball and always hold it during transitions.
  • The other line is the rotating line – they will rotate down to the next person in line during the transition music.
  • MUSIC:  I set up a playlist of about 20 songs and set the time for 40 seconds. Then I place a transition song that repeats between songs that is about 10 seconds long.
  • Start music:  Students pass the ball back and forth. Start with a bounce pass which is usually more accurate and easier to catch.
  • Rotate: After the songs ends there is a ten second transition song for the person at the end of the rotating line to run up and take their place at the beginning of the line. Everyone else in the rotating line moves down one place.
  • Reminders: A good pass is one that your partner catches. How many passes can you make in 40 seconds.
  • Adjust the length of the pass according to each grade level. Then adjust during the activity for each grade level.
  • Vary the style of passes: Bounce, chest, overhead

Variations: Stop the activity at any time to make changes. The stationary line now gets a chance to run over and make the change this time. Here’s some possibilities:

  • Chest Pass with Playground Balls/Basketballs
  • Bounce Pass with Playground Balls/Basketballs
  • Beanbags
  • Foam balls
  • Deck Rings
  • Footballs
  • Spinjammers/ Soft Frisbee
Print Friendly, PDF & Email

Tunnels

Equipment and Setup:

  • (Use Soft Soccer style ball or beanbags )
  • One ball or beanbag for each student
  • Chose partners – Decide who will be the tunnel to start the activity. The partner will be moving around the gym and try to close all of the tunnels by moving their ball or beanbag through tunnel.

Guidelines:

  • The people who are “tunnels” may pass a ball to themselves in the air, while the other students are dribbling their balls. If you’re using a beanbag, the tunnel can just throw and catch with themselves.
  • The partner will get a ball and begin to dribble with their feet in the playing area. If you’re using a beanbag and just throw and catch in the air, or practice sliding it.
  • When the activity begins half of the students will dribble their balls on the floor, and attempt to pass a ball through as many tunnels as possible. If you’re using beanbags, you’ll slide it through the legs.
  • The “tunnel” students should count how many balls or beanbags pass through their legs.
  • When five balls or beanbags have passed through a tunnel, that tunnel is closed and they sit down.
  • When all of the tunnels are closed, everyone sits down.
  • Partners connect with each other and change positions. There are new tunnels and new people moving to see how quickly they can close all of the tunnels.
  • Teacher may time students, then see if they can improve the time it takes to shut down all of the tunnels.
  • Variation: Tunnels open and close (jumping jack style)
Print Friendly, PDF & Email

Scooters

Scooters

  • Scooters are not skateboards, no standing on them. Start moving when you are on your scooter (Never run and jump on your scooter).
  • Get on your scooter and move in one of the six ways listed below.Set this up in your gym by putting half of your class spread out on the line at one end of the gym and the other half on the opposite end. Students will practice moving using all of the following methods. It’s important that students know that these are the only safe ways to move on your scooters. It also helps to have students make the effort to avoid collisions at the center of the gym.
  • The students follow the directions for each of the following movements by moving to the opposite end of the gym on the teacher’s signal, turning around and waiting for the next direction.
  1. Walk Forward: Pull forward with feet only – Hands on side handles
  2. Walk Backward: Push backward with feet only -hands on handles, turn head around slighltly to see behind you
  3. Arm Pull Forward: Lie on scooter and balance, use hands only to pull your body forward.
  4. Alligator: Lie on scooter – Use hands and feet
  5. Double Knee Coast: Both knees on scooters –
  6. Use hands to pull yourself forward
  7. One Knee On: Use the foot on the floor to propel yourself forward, while both hands hold onto the side handles.

Musical Scooters Warmup Activity

  • Students move in one of the modes from above.
  • When the music stops, spin yourself by using your hands only
  • Variation: Do a dead bug, by flipping on to your back, holding the scooter in the air and shaking your scooter and legs in the air.

Indy 500:

Setup and Equipment

  • Six color teams and six scooters
  • Set color team cones in a large track formation near the center of the gym to make a race track. Set the cones up so that there is one at each of the short end of the track and two on each of the long sides (straightaways) of the track.
  • Line up each team beside the cone of their team facing in a clockwise directions.

Guidelines for Indy 500

  • This will be a race around the outside of the cones. You’ll be lining up like it’s a 400 meter relay on the track.
  • Break into pairs by your team’s cone. The partner can only push when traveling around the curves. The driver has to  glide or make themselves move on the straightaways.
  • When you get back to your starting part, change places or let your other partners take a turn. Continue taking turns moving around the track.
  • How many laps can your team do in five, or maybe 10 minutes?

Glide Control

  • Two partners from each team line up at the black line in the front of the gym. One is standing, the other is sitting on the scooter.
  •  On the teacher’s signal, the person in back leans down low and pushes their scooter partner towards the climbing wall;
  • When they hit the wall or calmly stop before hitting the wall, pick up the scooter and run it back to the front of the line
  • The scooter is handed off to the next people in line and they now go to the end of the line.

Scooter Games:

Scooter Freeze Tag

Scooter Basketball

Print Friendly, PDF & Email

Octopus Run

Octopus Run: 

Setup and Equipment;

  • Select three people to be the octopuses (octopi). They stand on the center line to be the taggers. They will will try to tag people using the two-finger peace tag on the upper back of their classmates.
  • The rest of the class are crabs (octopus prey) and stands on one of the lines at one end of the gym, facing  the octopi.

Guidelines:

  • The game starts when the teacher starts the music.
  • The octopi are allowed to run anywhere in the gym and use their tentacles (hands) to tag others.
  • When someone is tagged by an octopus, they become seaweed and their feet attach to the ocean floor. Their arms are outstretched and they wave in the air as they attempt to tag people when they run by them.
  • After most of the crabs have made it to the other side the music is stopped. The students that are running turn around and face the wall they came from.
  • The teacher restarts the music and the crabs attempt to run back to their original starting line.
  • Play continues in this manner until most of the players have had a turn.
  • Anytime an octopus gets tired they may switch with one of the seaweed.
  • The game is over when most of the crabs have been turned into seaweed.
Print Friendly, PDF & Email