Jump Rope Tag

Setup and Equipment:

  • Jump Ropes and one end of the gym designated as the Jump Rope Area
  • Yarnball Taggers

Guidelines:

  • Four or five people are chosen to be “it”
  • All other players have a “safe base” available to them at all times.
  • If a player wants to avoid being tagged, they simply have to be completing a
  • series of ten jumps with the “invisible rope style” when the tagger tags them
  • If a player is tagged they must complete ten jumps with a jump rope in the designated jump rope area.


Print Friendly, PDF & Email

Basketball: Dribble Train

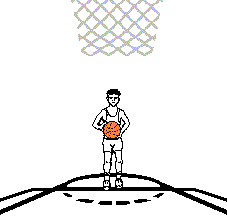
Setup and Equipment: Break students into 6 teams, each student has a basketball and has some dribbling experience.

Guidelines:

  • This will work best with students that have some basketball dribbling skills. You can adjust to their skill level. 
  • The object of this activity is to get a lot of practice dribbling a basketball.
  • Every students has a ball to start.
  • We break into six teams.
  • Teams line up so the students can follow the leader at the front of the line.
  • This will require students to keep their heads up to follow each other.
  • The team leaders will will “snake”  their line around gym without crossing through another team.
  • Their leader should move at a steady pace and try to keep the team together.
  • If someone loses their ball, they can retrieve it and return to their place in line.
  • The teacher can blow a whistle or stop the music after a minute or two. I like to use train sounds instead of a whistle. When it is time to rotate, the first person in line goes to the end of the line and everyone moves up one spot.  Each team now has  new leader to follow. After a few turns at moving in this manner, the students get the routine established and the activity moves smoothly.
  •  In the gym, I use the music to guide students through this activity. There are train sound effects that you can download and add to your music list. (see music ideas below).
  • Continue until all students have a turn as a leader.

Music for Dribble Train:

  1. Sweet Georgia Brown – The Globetrotters Theme Song #1 Basketball Songs Blues
  2. Train Bell Sound Effects 
  3. Mystery Train The Paul Butterfield Blues Band Blues  
  4. Freight Train Horn – \ The Hollywood Edge Sound Effects Library
  5. Last Train To Clarksville Sugar Beats Children’s Music
  6. (Chicago Bulls Theme) Bobby Morganstein
  7. Kernkraft 400 Power Music Workout Fitness & Workout
  8. Block Rockin’ Beats The Chemical Brothers 
  9. I’m a Gummy Bear (The Gummy Bear Song) Gummibär
  10.  Everybody Movin’, Pt. 1 (Kurd Maverick & Eddie Thoneick Remix) Bob Sinclar
  11. Wake Me Up Avicii
  12. Pumpin Blood  NONONO 


Print Friendly, PDF & Email

Bump Basketball (Official Rules)

Setup and Equipment: 2 Basketballs, Basketball Court – Free Line marked

Objective: The object of the game is to “bump” the other players out of the game by making a shot before the person in back of you in the line does.

  • Order is established by forming a line at the free throw line.
  • All players must attempt their first shot from this point.
  • The first and second players in the line get a basketball. Play begins with the first person in line taking the first shot.
  • After the 1st player shoots, the 2nd player may shoot.
  • If the first shot by a player is missed they must follow their rebound and try to make a basket from anywhere on the court.
  • The game at this point is between player #1 and #2
  • If player #2 makes a shot before the first player, then player #1 is “bumped” from the game.
  • If Player #1 makes a shot, the ball should be rebounded and immediately passed to the third player in line. The contest is now between players #2 and #3.
  • Players may only touch their own ball. There is no basketball skill involved in hitting a basketball with another basketball, so this is not allowed in the official rules of “Bump”.


Print Friendly, PDF & Email

Triple Shot Basketball

Triple Shot Basketball

Setup and Equipment:

  • For the teacher led demonstration chose three or four students

  • The demonstration is important especially for the second shot of the three shots. (Shooting from the spot you rebound from)

  • Each of the four teams has one basketball and a polyspot to designate an approximate free throw.

  • Another option for this game is to use the terms “recreational” and “competitive”for different games, this allows students to choose the game that is the best match for their skills.

  • In a typical Gym class four groups line up in back of the free throw line and start shooting on the teacher’s signal.

Rules:

  • Each Player gets three shots

  • SHOT ONE: From inside the free throw line – worth three points.

  • SHOT TWO: Wherever you catch the rebound from – worth two points.

  • SHOT THREE: A layup – worth one point

  • After turn is completed, pass the ball to the next person in the line.

  • Groups add each player’s points to their total.

  • After two or three minutes the teacher calls the game and all of the group rotates to the next basketball hoop.

  • The scoring continues at each of the four designated hoops.

  • The goal is to get your team to score as many points as possible, though, as usual, the most fun wins.


Print Friendly, PDF & Email

Beanbag Slide Tag

Setup and Equipment:

  • Twenty – twenty-five beanbags are spread around the floor
  • Students are standing at walls of the gym to start the game
  • Guidelines:

  • The object of this game is to hit the other player’s feet by rolling the beanbag
  • Players may not run with a beanbag!
  • Students stay within the boundaries (black lines) unless retrieving a beanbag that is out of bounds.
  • On the teacher’s signal – students run into the playing area
  • Students may roll it towards the feet of another student
  • If a player is hit on the foot – they go to the “out” line (Having some mats set up at one end of the gym will work).
  • Players that are out – reenter the game when the player that got them out gets out
  • When students don’t know who got them out, they go to the “clock box” – the teacher will time them out for 1 minute or at which time – they may reenter game
  • When too many students are waiting to get back into the game, Teacher may call out “everybody free” and the game continues.
  • Print Friendly, PDF & Email

    Warmup: Toy Story

    Equipment and Setup:

    • The Music from the movie:  Toy Story Infinity and Beyond
    • Students spread out in Scatter Formation
    • You may want to set up cones to designate the area that you want the students moving around

    Activity:

    • The students first must chose which of the toys from the Toy Story movies they want to be.   Common choices are: Buzz Lightyear, Mr. Potato Head, Army soldiers, Woody, and Barbie. If they haven’t seen any of the movies, they can just chose the name of any toy.
    • Start the music and the Teacher  says, “All Clear”.
    • Now, the students begin moving around the gym as a character in the movie.
    • When the music stops and the teacher says,  “Andy’s coming”, students should freeze in position and continue to look like their character.
    • You may have students guess what character their classmates are imitating when they are frozen.
    • Continue stopping and starting with the “All Clear” and “Andy’s coming” signals.
    • You can change levels (low/high) or locomotor skills such as skipping, hopping, galloping, walking slowly, or running.


    Print Friendly, PDF & Email

    Pajaggle


    Pajaggle Stacks

    • Hold up a Pajaggle (large foam puzzle piece) and show the students that the outside piece is the ring. Click Pajaggle for more information.
    • The inside piece is the insert. If there is a still smaller insert, this is called a mini insert.
    • Note: Use your hand only whenever you are removing an insert from a ring.

    Activity: Team Pajaggle

    • Distribute a class set of Pajaggles (Large foam puzzle pieces) at one end of the gym.
    • Separate the rings and the inserts.
    • Relay: Line up the classes in four equal lines at the opposite end.
    • First person on each team gets ready to run.

    Guidelines:

    • On the  teacher’s signal, students run to the end of the gym and pick up one ring.
    • They run back to their line and give a high five to the next person in line.
    • The second person in line will pick up an insert that they think matches the ring.
    • If it fits, the next person in line runs down and gets a new ring.
    • If the insert does not fit, the next person in line returns the insert and tries to find another one that fits.
    • This continues all of the pieces are gone.

    Game: Chasers and Puzzlers (This event is timed)

    Setup and Equipment

    • The class is divided in half.
    • One half of the class are the chasers and the other half is the puzzlers.
    • The puzzlers sit around the center circle in the gym.
    • The pajaggles are set up at one end of the gym with the inserts taken out.
    • The chasers line up their relay teams, so they can easily pass beside the puzzlers in the center of the gym.

    Guidelines:

    • On teacher’s signal, the chasers run one at a time to pick up one piece at a time and hand it off to the puzzlers.
    • The puzzlers will begin to put the pajaggles together in one giant puzzle.
    • Chasers continue running until all of the pieces are in the center of the gym.
    • Puzzlers continue until the giant puzzle is put together.
    • The teacher stops the time when everyone is sitting down and the puzzle is completed.
    • For a Challenge: Classes may compete against each other, to see who has the lowest score


    Go to the Pajaggle Website for more information.

    Print Friendly, PDF & Email

    P.E. Game: Chasers and Puzzlers


    Pajaggle Stacks

    Setup and Equipment

    • The class is divided in half.
    • One half of the class are the chasers and the other half is the puzzlers.
    • The puzzlers sit around the center circle in the gym.
    • The pajaggles are set up at one end of the gym with the inserts taken out.
    • The chasers line up their relay teams, so they can easily pass beside the puzzlers in the center of the gym.

    Guidelines:

    • On teacher’s signal, the chasers run one at a time to pick up one piece at a time and hand it off to the puzzlers.
    • The puzzlers will begin to put the pajaggles together in one giant puzzle.
    • Chasers continue running until all of the pieces are in the center of the gym.
    • Puzzlers continue until the giant puzzle is put togeteher.
    • The teacher stops the time when everyone is sitting down and the puzzle is completed.
    • For a Challenge: Classes may compete against each other, to see who has the lowest score

    Visit the Pajaggle website for more information:

    Go to the Pajaggle Website for more information.

    Print Friendly, PDF & Email

    Capture the Targets


    Setup and Equipment:

    • Players are divided into two teams.
    • Each team has a different colored jersey.
    • The wall for each team has a gym mat in it, this is the “Cooler” for the opposing team.
    • Six foam targets are placed at each end of the gym (inside of a hula hoop). It works best if the team with the blue jerseys are retrieving the blue targets, etc.
    • The area between the wall and the endline is the designated safe area for opposing players attempting to retrieve their pin. Only one player from the opposing team may be in the safe area at a time.
    • The Object of the Game: Players attempt to remove the pins from the  opposing team’s endline and return them to their own endline.
    • The Game is Over: when all of the pins have crossed the line and are in their team’s safe zone.

    Guidelines:

    • Students are safe on their own side.
    • If a player crosses the center line they may be tagged by the opposing team.
    • Tagged players are frozen until a teammate reaches them and grabs their hand.
    • They both are allowed free walk-backs to their side, as long as they are holding hands and have their hands raised in the air.
    • Players that reach the opposing team’s targets are safe as long as their hand is on the pin and they remain behind the line in the safe zone.
    • If the player removes their hand from the targets, the opposing player may tag them and the target stays at that spot. The tagged player goes to the “Cooler”.
    • As soon as the target leaves the safe zone line the player may be tagged. The target is set down at this spot. The player who was carrying the pin, then returns to their side.
    • Only one player at a time may be in the safe zone. If two players are in the safe zone at the same time, they both must go to the “Cooler”.
    • A player that is tagged while carrying a pin must set the target down at that spot and go to the “Cooler”.
    • Targets may never be thrown.
    Print Friendly, PDF & Email

    Diabolo

    Diabolo

    Diabolo Tricks Link

    • Start by setting the diabolo on the string and then on the floor to your right.
    • Set the diabolo in front of your right foot, stand up and move to farther to the right if possible.
    • The farther the diabolo is set to the right of you, the more spin possible. (Note: lefties will need to set the diabolo to the left)
    • Before rolling the diabolo, stand pointing your sticks at the diabolo off to your left. The string should be hanging from sticks to diabolo. If not position the diabolo even farther right.
    • Roll the diabolo across the floor in front of you. Start your roll slow, but accelerate faster as the diabolo moves left.
    • As the diabolo reaches a point in front of you (before your left foot’s position); gently lift the diabolo up with both sticks.
    • The diabolo should be spinning counterclockwise.
    • Try to center the diabolo and begin to pull harder with the Right handstick.
    • Practice goals are to reach a medium speed without causing the diabolo to swing wildly after the pickup.

    Tips:

    • Once you know how to get the diabolo spinning, the next problem is to keep it from tilting.
    • If the diabolo’s near cup is tilted down toward you, put your right stick forward. You can keep pulling with your stick forward to keep your speed up as you correct.
    • If the diabolo’s near cup is tilted up toward you, put your right stick back. You can keep pulling with your stick back to keep your speed up as you correct.
    Print Friendly, PDF & Email