Offense/Defense and Walking Tag

Find a partner

  • Everyone skips to the music, when the music stops, stand back to back with a partner.

Offense/Defense Tag

  • One partner on each team sits down.
  • The partner who is standing is the offensive player
  • The partner who is sitting is the defensive player.
  • The object of this game is for the defensive player to stay within one arm’s length to the offensive player, so that when the music stops they are within one arm’s length of their partner.
  • The teacher designates a locomotor skill: Skip, gallop, slide step, power walking, jogging.
  • The offensive player will try to lose the defensive player.
  • The defensive player will try to stay within one arm’s length.
  • When the music starts, the game starts. Players are moving around the gym in designated manner. Let the music go for no longer than 30 seconds
  • When the music stops, everyone must freeze immediately and the defensive player will extend their arm to see if they can tag their partner.
  • Switch offense/defense positions every time the music stops.

Walking Tag with Partners

  • This is a game where everyone is playing tag with partners at the same time.
  • Chose partners – One Partner: Raise hand. You will be “it” and begin walking around the gym.
  • Other partner: Close eyes and make three complete turns.
  • Open eyes and walk to try and find partner.
  • Students will tag their partner with a gentle tag on the back with two fingers
  • When a partner is tagged, students  switch roles.
  • After everyone has played for a couple of minutes, the teacher can give a reminder to the class that there are 30 seconds left, so if you haven’t had a turn in both roles, switch roles for the rest of the time.


Warmup: Meet and Greet

Setup and Equipment

  • Class breaks into partners – It works well to play music, then stop the music and have students stand back to back with someone near them.
  • Line up two lines with equal numbers of students
  • Initially you may want to  put Poly spots  down so that students are spread out equally.

Guidelines

  • Stand facing your partner with the middle line in the gym between you.
  • On the teacher’s signal, you will run to the wall in back of you, touch the wall,  and return to face your partner.
  • Each time you meet, the teacher will add a simple physical task for you to complete.
  • These activities will be cumulative. So, it is important to remember each task.

Here’s a Start:

  • High-five R hands
  • High-five L hands
  • Jump and turn 360°
  • Jumping high-ten
  • Elbow turn R and L
  • Do si do
  • Create your own

P.E. Game: Flying Disc (Frisbee) Bowling


Setup and Equipment:

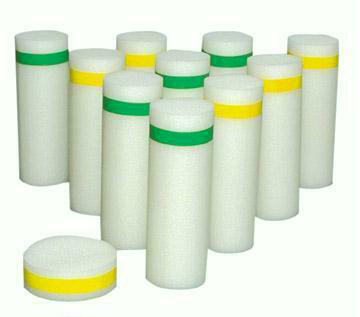
  • Flying Discs (One for each relay team),
  • Targets are set up in bowling formation at the opposite end.
  • Soft Foam Targets (25-30).
  • Teams are set up in relay style.

Guidelines:

  • The object of the game is to be the team that knocks over the last target.
  • The winner is whoever has the most fun!
  • One player from each team runs to the center line and throws the disc and tries to knock over as many targets as they can.
  • Then, they retrieve the disc and run it all the way back to their line and hand off to the next person in line. Note: watch out so you don’t run in front of a thrown disc.
  • You can also use balls, beanbags, etc.

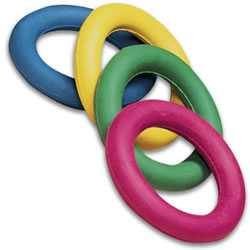
P.E. Lesson: Deck Rings

Tossing:  Teacher led demonstration

  • Toss right – catch right.
  • Toss right – catch left.
  • Crossover – Left to Right, then right to left.
  • Toss – clap once, then twice, three times and catch.
  • Toss up, then catch in a kneeling position.
  • Toss up – make 1/4, 1/2, 3/4, then try a 360 degree complete turn.

Tricks

  • Put deck ring between feet, jump and catch.
  • Toss deck ring up and catch on your foot.
  • Throw deck ring in the air and catch down your arm.
  • Partner toss – pass on a signal so both are in the air at same time.

Fun with Deck Rings

  • Run in front of deck ring and pick up with one hand
  • Jump over your deck ring as it rolls- How many times?
  • Run along side deck ring and pick it up with your foot
  • Spin you deck ring

Deck Ring Partner Tunnel Activity

Setup and Equipment:

  • In Partners
  • One partner gets a deck ring, the other partner stands in tunnel style with feet wide apart.
  • Tunnels should spread out around the gym.

Guidelines

  • On teacher’s signal the student that has the deck ring kicks the deck ring through the legs of as many “tunnels” as they can in one minute.
  • Switch and let the other partner try it.
  • Next time around, let the first partner kick it through the legs of as many people as they can, but this time the “tunnels” will sit down after they have had five of the deck rings slide through their legs. How long does it take to get all of the “tunnels” sitting down.
  • Switch and let the other partner try it.


Deck Ring Tunnel Game

Setup and Equipment:

  • Partners
  • Spread out around the gym.
  • One partner gets a deck ring, the other partner stands in tunnel style with feet wide apart.

Guidelines:

  • On teacher’s signal:The partner is who is the “kicker” attempts to  kick the deck ring through as many tunnels (legs)  as they can in one minute (times may vary).
  • Switch and let the other partner try it
  • Next time around, let the first partner kick it through as many tunnels as they can, but this time the people who are the  tunnels will sit down after they have had five of the deck rings slide through their legs. How long does it take to get all of the “tunnels” sitting down.
  • The teacher may want to time this, then you can challenge the other partners to see if they can better the time.
  • Switch and let the other partner try it.
  • Variation: May also use foam balls or deflated soccer balls, etc.


P.E. Lesson: Getting Ready for the Jogathon

Jog/Walk Progression

  • Add a lap each week starting the third week in April.
  • This will help prepare students for the Spring Jogathon and the 4th/5th Track Meets.
  • At Edison: Students run a half block, starting at the gym, then towards Onyx Street, down to 23rd, then back to Emerald and the Gym.
  • Jogathon Preparation: Give each student an index card and set the timer for 10 minutes (first class) 15 minutes (second class) and so on.
  • Mark off the cards with a marker for every lap that students complete.
  • OR… use a hole puncher to punch the index cards.

To add interest and variety:

  • You can give students stickers will for each lap.
  • Read off the elapsed time when each student completes a lap.
  • Wear Pedometers: Estimate steps before running.

Juggling

juggledog

Skill Lesson 1: One Ball

1. Throw and catch using one hand, then the other
2. Throw with one hand and catch with other
3. Throw, clap, catch with other hand
4. Throw, clap, clap, catch with the other hand
5. Throw, clap under leg and catch with the other hand and so on
5. Throw, turn all the way around and catch with other hand, etc.
CUE: THROW-THROW, CATCH-CATCH

Skill Lesson 2: Two Balls

1. Start with two balls in your favorite hand, throw one up, when it gets to the top, throw the other one
2. Throw around in a circle, throw the first one out toward the side, when it peaks throw the second in the same arc, keep them going in a circle
3. Throw in circle from outside to the center
4. Do each of these 3 moves with the other hand
5. Hold a ball in one hand, throw the first across like a big letter “x”, when it gets to the top throw the second up and across the other way; catch the first, pause, catch the second

CUE: THROW-THROW, CATCH-CATCH

Skill Lesson 3: Three Balls

Start with 2 balls in your dominant hand. #1 is held loosely on the finger tips, #2 is in the other hand and #3 is deep in the dominant hand.

Throw #1, Throw #2, Catch #1, Throw #3 and let #2 and #3 fall

Throw #1, Throw #2, Catch #1, Throw #3, Catch #2 and let #3 fall

Throw #1, Throw #2, Catch #1, Throw #3, Catch #2, Catch #3

CUE: THROW-THROW-CATCH-THROW-CATCH-CATCH

Challenge: Under the leg and behind the back can be used to start a juggling sequence.

P.E. Game: Predator vs. Prey (Floppy Fish)

Setup and Equipment:

  • Yarn balls or Ocean related taggers (stuffed fish, etc.)
  • Pick four people to be it.
  • One mat in front of each wall, these are five second bases (islands). You cannot be tagged while resting on an island.
  • The Taggers are the Predators,
  • Everyone else is the prey.

Teach students how to do the floppy fish and shake.

  • Hands out like a regular handshake
  • Tap each other’s forearms with a floppy fish motion.

Guidelines:

  • The object of the game is for the predators to tag as many people as they can and the prey to free each other.
  • The Predators start in the center circle, the prey  stands on a mat to start.
  • The prey can be tagged by a hand holding the tagging item, or when it is thrown.
  • If a person is tagged they become a fish and stand doing swimming motions (crawl, backstroke, tc.).
  • They can be transformed back to human, when someone gives them a floppy fish handshake.
  • Game continues, pick new Predators, every two minutes or so.

P.E. Lesson: In Line Skating

Thanks to the PEP Grant each Elementary school in 4j now has helmets, along with knee, elbow, and wrist pads. The skates will arrive in two large (locked) steel rolling carts for a three week stay.

Equipment/Setup

  • When the elbow and knee pads are too large, it will help if you cross the velcro straps and duct tape them in the middle. This makes it possible to have these pads fit elementary age students.
  • With the wrist pads, putting a piece of duct tape at the end of each strap, will help so that the straps are cannot be pulled all of the way through. We find that many students have a difficult time putting the strap through the loop and pulling it back to velcro it.
  • Pads and helmets – Introduce how to get on elbow, knee, wrist pads and helmets.
  • Skates – The smaller skates ( size five and below) are adjustible.
  • The rest of the skates (size six and above) will be similar to their shoe size.

#1 Skill  – Standing up –

  • From a sitting position, get up on one knee, with the other skate on the floor.
  • Then put both hands on that knee push straight up, while lifting your body up to standing.

#2 Skill – Ready Position:

  • Bend knees
  • Weight forward
  • One foot slightly in back so heels are together in a V shape
  • Put hands on knees to regain balance if falling backward

#3 Falling (SPLAT! )

  • Practice with students on falling and making sure they land on their pads.
  • Pads must be fitting properly for this to work.
  • Drop to knees and “splat” forward – while landing on pads.

#4 Stopping

  • Weight on nonbrake leg
  • Put brake leg forward and slightly lift toe
  • Press calf against back of skate
  • Shoulder and arms forward

#5 V-Stop

  • Point toes together to stop. This is similar to doing the snow plow when skiing.

#6 Starting to Skate – Stroke and Glide

  • Right foot stroke
  • Push Forward
  • Lift left foot off of the floor and coast

Games/Activities:

  • Red Light – Greeen Light – Practice stopping at teacher command
  • Musical Stopping – Come to a complete stop when music stops
  • Skating Obstacle Course: Students travel around a series of cones
  • All Boy and All Girl skates. Once you have a class up on skates you can mix things up by having just the girls skate for the length on one song, then (The kids won’t let you forget!) let the boys skate for the duration of a song.
  • Reverse Direction: Have the class come to a complete stop and splat on the floor. When they get up have them travel around the gym in the opposite direction.
  • Student Routines: Pairs or small groups of children come up with a “couple of moves” to teach the rest of the class

Lesson Plan for K,1,2: Beanbags

Students Move around the Gym:

  • Start the Music – When the music stops, let your beanbag fall to the floor and stand and balance on one foot on the beanbag.
  • Use Locomotor Skills: Skipping, Slide-step, galloping, jogging, etc.
  • Variations: Carry beanbag on your: Head – Foot – Shoulder – Elbow – Back of Hand – Etc.

Teacher Leads Demonstration at Gym Homes (Personal Space): Toss beanie in the air and …

  • Throw and catch beanie 10 times,
  • Throw beanie in the air and clap once, then catch
  • Now, do 2 claps
  • 3 claps, etc.
  • Toss and catch beanie in your right hand only
  • Catch in your left hand only
  • Throw beanie in the air and turn around and catch it.
  • Put beanie on your gym home and skip around the gym without touching any beanies
  • Toss and Walk – walk around the gym:
  • Freeze: Let beanie drop to the floor and balance on it.
  • Leap: Run and leap over as many beanbags as you can.
  • Bridge: Make a bridge over the your beanbag
  • Home Beanie: Run and drop your beanie into the basket and go to your gym home.
  • Underhand Toss: Right hand throw and catch. Left hand throw and catch. Throw from right to left. Ten times each.

Beanie Partners

  • Stand  5-10 feet away from your partner. Feet are shoulder length apart.
  • When music starts, slide and/or throw the beanbag back and forth. Freeze when music stops.
    • Slide and catch.
    • Two hand throw and catch.
    • Dominant hand throw and catch.

Guards and Sliders

  • Break the class in half. One half are the guards and one half are the sliders.
  • The guards get foam targets and spread them out all around the gym floor.
  • The sliders get a beanbag and stand outside of the target area.
  • The object of the game is for the sliders to attempt to knock over and many targets as possible and the guards to stop the beanbags from knocking over their targets.
  • When a target is knocked over, guards may put them back up.
  • For those keeping score – one point for each knock down and one point for the guards for each stop.
  • Continue until music stops, then switch roles.

P.E. Game: Turtle Tag

Setup and Equipment:

Four or Five Yarn balls for players that are “it”
No bases in this game.

Rules:

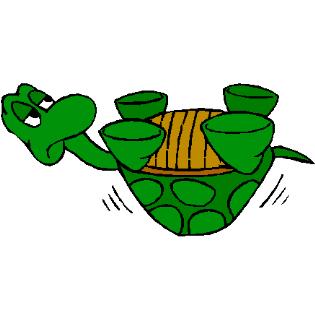
  • The “base” in this game is when players are on the floor with their knees pulled up towards their chest and their head looking toward the floor.
  • Another “base” is when they lie on their back, flip their scooter over and shake their scooter and feet in the upside down turtle position
  • Some classes may also need this rule: Players may stay in the “base” position for five seconds.
  • If a student is tagged do an exercise:
  • Balance on one foot for ten seconds
  • Run up the stairs and back down (Edison)
  • Climb the wall and touch above the highest handhold
  • Do ten jumping jacks, pushups, sit ups, etc.